Teaching Tip: Provide each student with a field journal at the start of the unit. A field journal reinforces art and science connections while giving students one place in which to keep all their research and drawings.
Step 1: Close looking
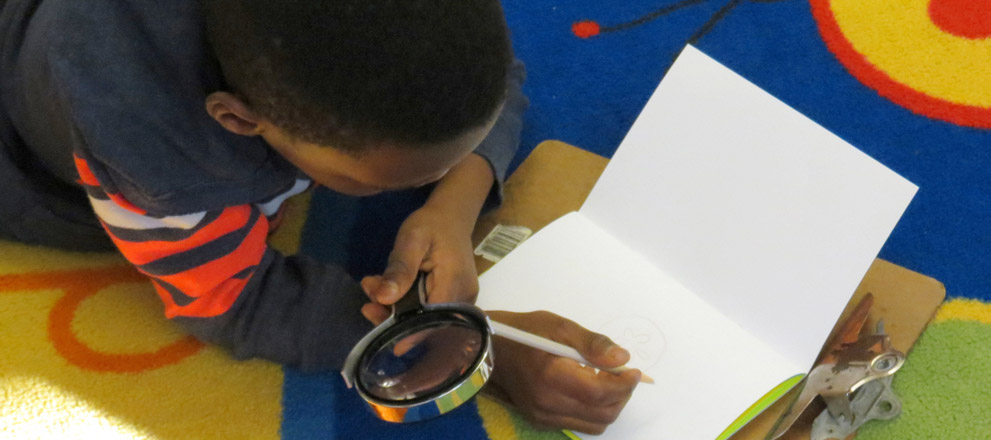
Bring the rocks to the floor and have students sit in a circle. Pass out paper or a field journal to each student. Ask the students to draw the rock you are holding. Next ask the students to take a moment and look very closely at the rock you are holding. Use a document camera to magnify the rock’s details. Have the students list the details they now see in the rock. Have them re-draw the rock.


Step 2: Adding texture
Have students choose a rock, shell, or object. Ask them to look closely at their object and share one detail they see. Introduce the viewfinders. Show students that using viewfinders helps them discover even more detail by providing a window onto a section of the object.
Talk about how details are often made of different textures. Have students name some textures they see in their object (rough, smooth, cracked, jagged, sharp) and use their viewfinder to narrow in on a chosen part of their object and draw what they see. Reinforce the idea that close looking is an attribute of both scientists and artists. This project asks them to be both!
Have students list the textures they see in their objects and make notes in their journal.
Teaching Tip: We begin the drawing exercise with volcanos, but you can begin with any landform you choose.
Teaching Tip: Create small stations for students to rotate on their own time throughout the class period to complete their journal entry (i.e. observational drawing, drawing of landform, coloring of landform, writing about landform, embellishing landform.


Step 3: Drawing volcanos
Start by asking students to share their answers to the critical questions about volcanos: What is the core material in a volcano? How does it change over time? Is it slow or fast? Where are volcanos located?
Lead the students through a close looking exercise using a picture of a volcano. Consider using various images of volcanos at different stages of action (e.g. erupting, dormant). Consider using Visual Thinking Strategies for the close looking activity.
Ask students to name the textures they see in the volcano and note them in their field journals.
Next, using their knowledge of facts and details about volcanos, have the students draw an example of a volcano in their field journals using pencil. This is called a scientific illustration. Emphasize that scientific illustrations require accurate facts, textures, and details (including the environment around the volcano) to be included and encourage students to use as much information as possible in their drawings.
Drawing Option: Consider leading the students through the creation of a list (or rubric) of details that belong to volcanos that should be included in each drawing. This requires consensus and group decision making.


Step 4: Using color
Once the pencil drawing is complete and includes details appropriate for accurately depicting a volcano, students can add color to emphasize and further create texture.
Ask students for examples of warm and cool colors. Ask if volcanos are mostly warm or cool landforms. Let them know that volcanos are warm—due to lava and magma—and have students use only warm colors on their volcanos.
Have students color their volcanos using colored pencils or watercolor pencils. Watercolor pencils are easy to use and allow for smooth yet controlled lines without the mess of painting (dip colored pencils into cups of water and use as a pencil).
Remind students of the textural lines of a volcano and how color can emphasize those textures and details. Where would the color make the most impact? Where is the focal point (lava)?
Consider providing mixed media to use on the drawing once the color pencil or watercolor pencil dries. Lava can be an exciting part to emphasize on volcanos through glitter. A glitter station can be an easy final step and allow students to add a special detail not often used in science class. Have students write a research sentence about the landform after each drawing is complete.
Drawing Option: A glitter station can be as easy as red glitter in a box top. Have students put a line or two of glue on their volcano where the lava would be flowing. Remind them that the glitter will further emphasize the detail and texture of lava. Place the volcano drawing—glue face down—in the box. Lift it out and tap off excess. Let dry.
Repeat steps 3 and 4 for each landform type
Consider narrowing the color choices to either warm or cool for each landform:
Volcano = warm, Glacier = cool, Hoodoo = warm,
Earthquake = warm or cool (student choice)
Use various mixed media for each landform:
Volcano = red glitter for lava emphasis
Glacier = foil or reflective papers for collaging ice details onto their drawing
Hoodoo = sand for textural emphasis
Earthquake = have students draw a landscape and then rip the landscape in half. Have them reposition and glue down the ripped pieces indicating one of three typical earthquake motions: rubbing together, pulling apart, or pushing together. Have them label the earthquake motion after gluing the two landscape halves together in the chosen formation.


You must be logged in to post a comment.