SET UP: Cover tables with newspaper/plastic. Place 1–2 landforms on each table grouping by color scheme. Put individual paint colors in small containers assigning one color and one brush to each student.
Step 1: Painting large areas
Plan a color scheme for each of the landforms (e.g., volcano=warm,
glacier=cool). Premix a few colors using black and white, creating different tones and shades to create a more pastel and earth-toned color palette.
The different areas of color for the paint should be mapped out on the sculpture before painting begins like stained glass. This can be done with a sharpie, pencil, or with a material like yarn that is glued on. This helps to keep students painting in the correct place.
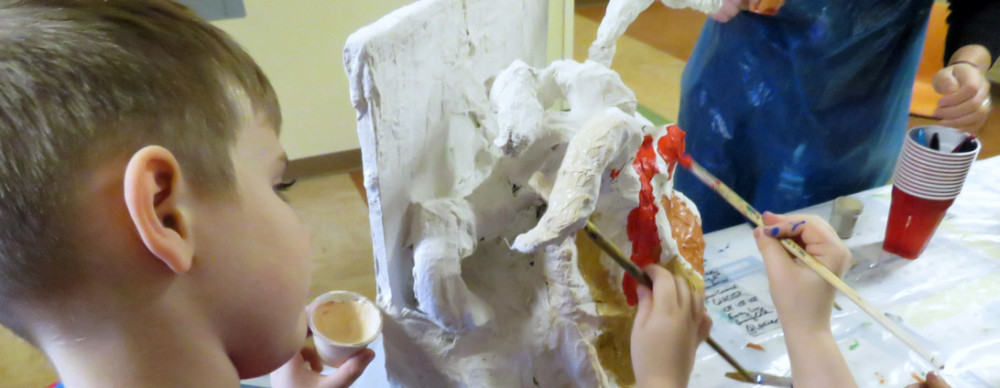
Have 2–4 students come up and receive one color each and a large paintbrush to paint in a predetermined space on the landform, beginning with largest areas. Swap painters out for new students every five minutes or so. Each child paints with one color in one specific area that is designated by the teacher.


Teaching Tips:
- Collaborate with your school’s art teacher when explaining color theory and mixing the paints yourself.
- Have the first 5 mins of working be in complete silence and gradually increase to a whisper.
Step 2: Painting details
Students should use their drawings and research to inform their use of color and the addition of detail to their landforms.
Detail work should be done after the large areas are dry. Detail work can be done in pairs and and all students can contribute.
Depending on the sculpture, some detail work might be done using a permanent marker.


Step 3: Adding embellishments
While paint is still wet, add embellishments that will dry onto the paint such as glitter, sand, colored paper, and string. Students should use their drawings and research to inform the addition of detail to their landforms. Prompt them to consider the mixed media materials they used for the drawings in their field journals (sand for the hoodoo, glitter for lava, etc.).

You must be logged in to post a comment.